Running the Development Containers Demonstration Base Image
The development container demonstration to create a container in which you can use your Visual Studio Code editor in a well-defined development environment includes a shell script (bld.sh) to make the process of running the demonstration as easy as possible. This topic lists and describes the parameters that you can specify when running bld.sh.
- The installable executable file for Micro Focus Enterprise Developer UNIX Components. This is setup_entdev_for_docker_10.0_platform.gz and is supplied in the container demonstration for the Micro Focus Enterprise Developer UNIX Components base image.
- The appropriate license (.xml) file for Micro Focus Enterprise Developer UNIX Components.
- A locally-installed version of Visual Studio Code that contains the Remote Development extension pack. This pack contains four extensions that facilitate the opening of files and folders within a container. (The necessary Micro Focus extensions, required to provide the COBOL development tools and runtime environment, are installed during the demonstration setup.)
- Execute the shell script to build a development container base image:
./bld.sh { IacceptEULA devcontainer [options] }options enables you to specify a number of characteristics for the image, such as any ODBC or Java requirements, or auto-login credentials. For a full list of available options and their definitions, run ./bld.sh without specifying any other parameters.
The DevContainer directory, within the Examples directory installed with the development product, contains a number of COBOL projects that you can open within the development container. This directory also contains a script that prepares the devcontainer.json files for each of those projects - this file is necessary to link the project with the development container.
-
Follow the on-screen instructions to run the preparation script.
The file specified as a parameter is an environment file that was generated during the creation of the dev container base image, containing the required environment settings to link each project with the container. The contents of this file is used to populate the ./<project>/.devcontainer/local/devcontainer.json file.
- Open Visual Studio Code in one of the project directories and it will recognize the project's
.devcontainer folder structure, and prompt you to reopen the project in the development container.
Tip: To view the image that the container is based on, navigate to the devcontainer.json file (located in the .devcontainer folder), and view the "image" value.
- If prompted, click
Reopen in Container; alternatively, click the
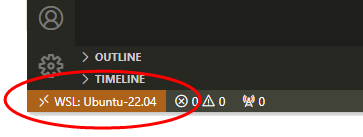
Remote Host connection (below), and then select
Reopen in Container.

A development container is started and the project is opened within it. When you close the project, default behavior is that the container is stopped. This behavior can be changed by editing devcontainer.json; see https://code.visualstudio.com/docs/devcontainers/containers.