Publishing And Control of a Deployment
Once a deployment project is configured, it needs to be published to Azure.
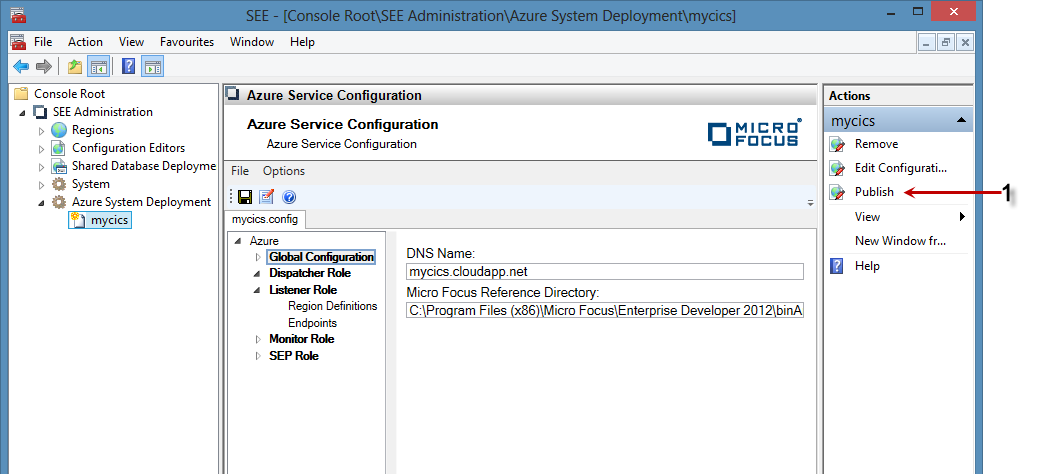
- Open the
Enterprise Server for .NET Administration tool and select the deployment you want to publish.

- Click
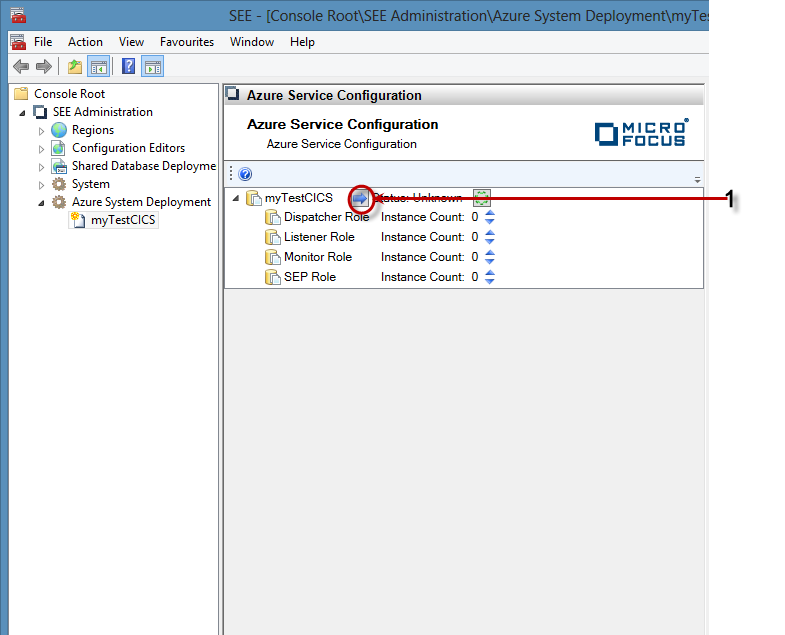
Publish in the Action pane (1 above). The view will change to publish/control mode.

- To publish and start the deployment, click the blue arrow icon (1 above)

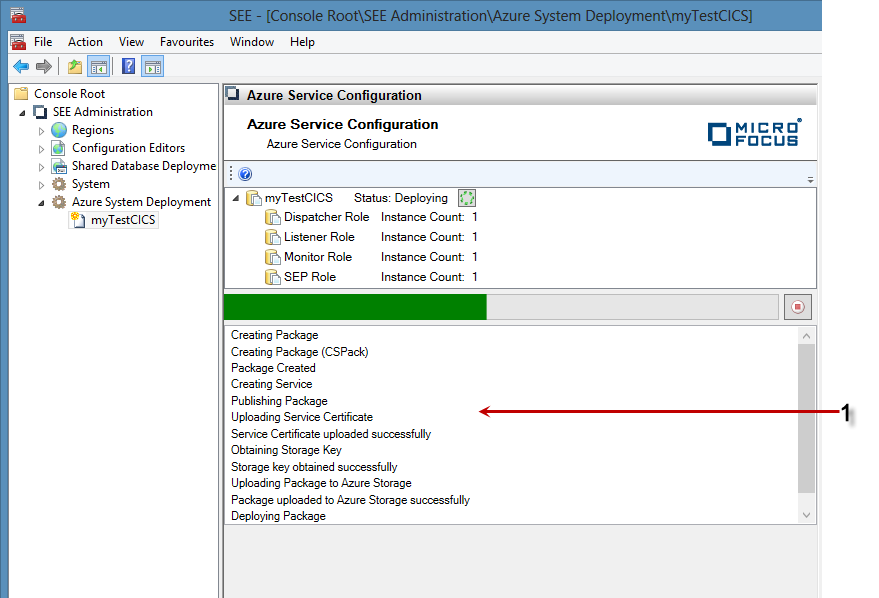
- The system will package and deploy the project to Azure. An informational panel (1 above) will display the latest status of
the deployment which is refreshed every few seconds.

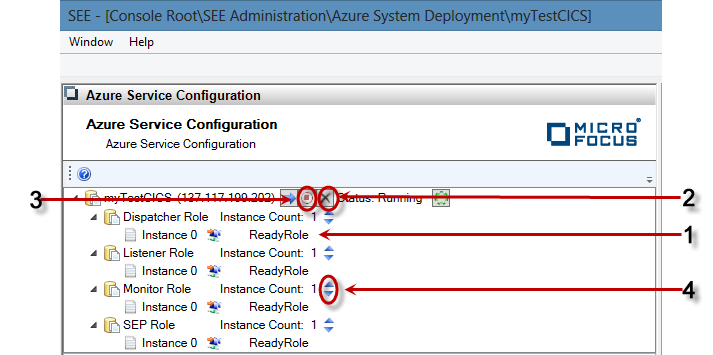
- A deployment is ready when each Worker role instance is in the ReadyRole state (1 above). It may take some time to reach this state. If the deployment is not in this state, it will not be possible to start or use a region . Each role will go through two initializing or updating steps .
- To delete a deployment, click Delete (2 above). This stops and deletes the deployment.
- To stop a deployment, click Stop (3 above).
- You can increase and decrease the number of instances of each worker role dynamically by using the increase and decrease icons
next to each role (4 above). When increasing the number of instances, the Azure fabric will start a new VM and deploy the
package to it. Once the new role is ready, it will accept work for the role from the Azure load balancers.
Once you are happy with the new number of instances, click the green check icon which will appear when the instances are modified.
Note: When decreasing the number of roles, a random instance will be stopped and deleted. At the moment, the role only receives notification of its demise a short time before it is destroyed. This is an Azure limitation that we cannot code around. This means that it might not be possible for the role to finish any work it is currently busy with. Use this functionality with caution.
Once the deployment is in a ready state, you can use the region control functionality of the administration tool to configure and control the regions.