Run a JCL Job
Now that your Fileshare server server1 and your enterprise server FSDEMO are both running, we will run a simple JCL jobstream to verify that new datasets are created correctly and that everything is working.
- Create an iefbr14.jcl file in the fsdir directory.
- Open the file in a text editor and copy the code below in it:
//DMFBR14  JOB 'DMFBR14',CLASS=A,MSGCLASS=A
//STEP1    EXEC PGM=IEFBR14
//SYSOUT   DD SYSOUT=*
//SYSPRINT DD SYSOUT=*
//DD1      DD DSN='DMF.TEST.DSN',DISP=(MOD,DELETE)
//DD2      DD DSN='DMF.TEST.DSN2',DISP=(MOD,DELETE)
//*
-
Because you used the casstart command to start FSDEMO, you can submit the JCL from the Enterprise Developer command line. In your fsdir directory, enter:
cassub -rFSDEMO -j/fsdir/iefbr14.jcl
If you had started FSDEMO via ES Admin, you would have had to submit the JCL using the JES Control page in ESMAC.
The job is parsed and then waits for a batch initiator to run it.
- In ES Admin, click Details in the Current Status column of FSDEMO, and then click ES Monitor and Control.
- With JES selected in the Resources list, click Control to display the JES Control page.
- Type
A in the
Classes field and click
Start to start a class A initiator.
The JCL job runs.
- Click
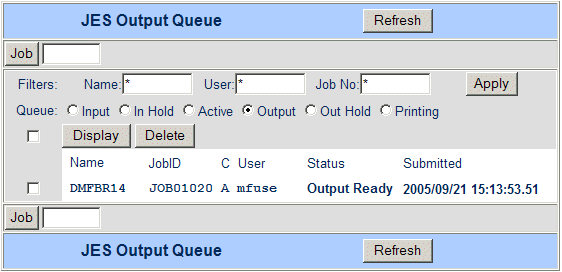
Spool to display the JES Spool page and click the
Output radio button. You should see something similar to the following:
-
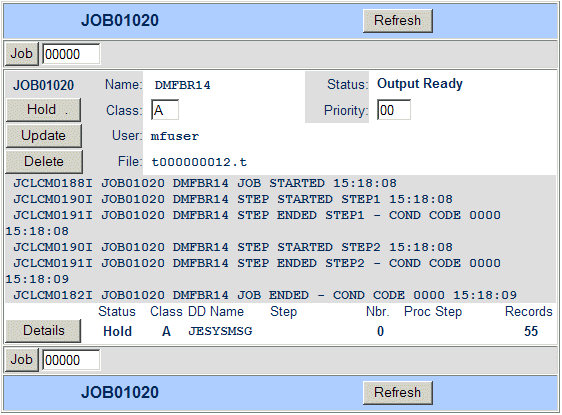
Select the DMFBR14 check box and click Display to display the details for the DMFBR14 jobstream, as follows:
- Click
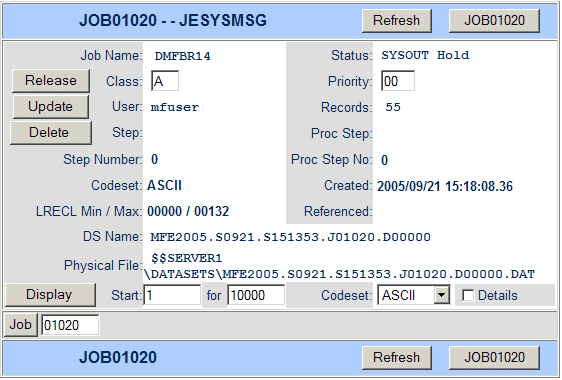
Details next to the SYSLOG.
You should see something similar to the following. Note how the Physical File field is qualified using the Fileshare server name.
- Click
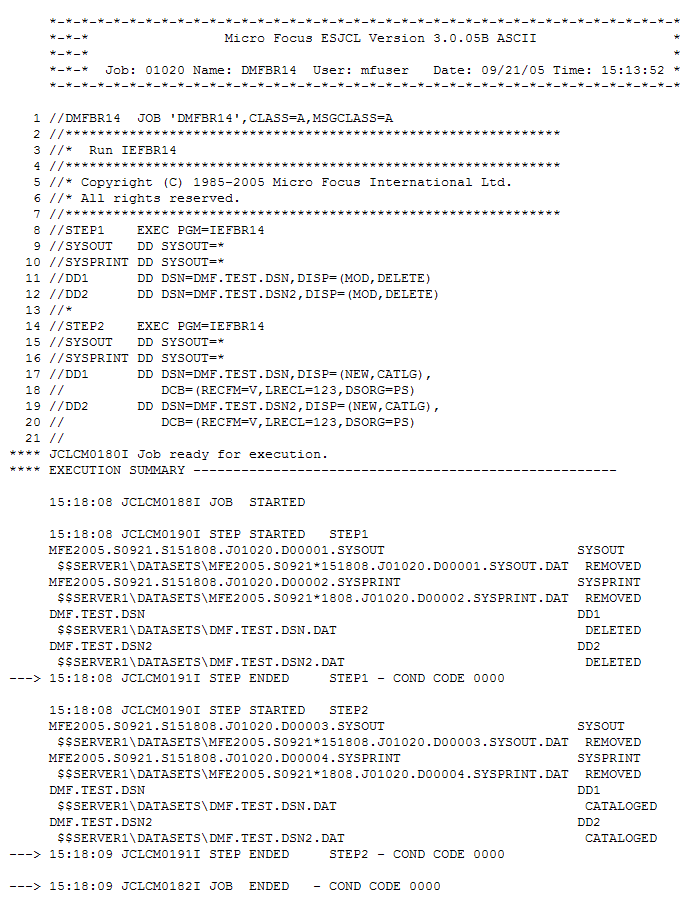
Display.
You should see the joblog displayed below. The PC filenames have now been resolved to be qualified by the Fileshare server name. ($$SERVER1).
-
Click Back, and then click Catalog to display the JES Catalog page. Click DCB to the right of the entry for the newly created dataset DMF.TEST.DSN.
Details for the catalog entry are displayed.
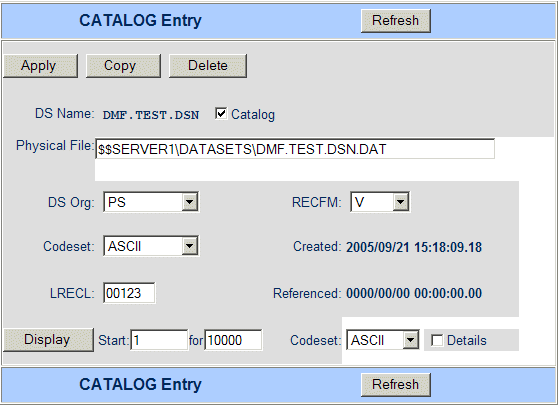
You have now verified that everything is configured and working.