Add Your Tables
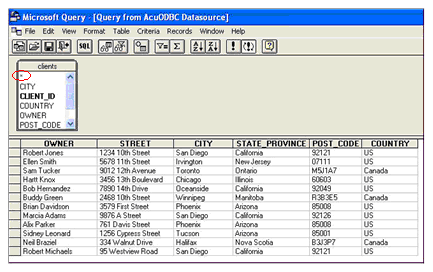
- Click the table or tables that you want to add (for example, clients) and then click Add. Close the box when you're done. For each table you selected, a list box is displayed on the Microsoft Query screen. This box lists all of the columns in the associated table.
-
In the list box, double-click each column that you want to read intoto read into your Word doccolumns, double-click the "*"
at the top of the list box. your Word document; that column then appears on the screen. If you want to add all In the list
box, double-click each column that you want to read into your Word doccolumns, double-click the "*" at the top of the list
box.
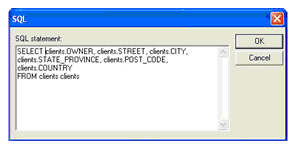
 If you prefer, you can select columns or further refine your query by clicking the
SQL button in the toolbar and typing your own SQL statements, such as the one shown below.

Click OK when you're done.
See Summary of Supported SQL Commands for a description of the SQL commands supported by AcuXDBC.
- Click File > Return Data to Microsoft Word on the Microsoft Query dialog box.
- If you or an administrator established database security methods during AcuXDBC setup, the AcuXDBCC Login dialog box appears; type a valid User ID and Password, and click OK. If no security methods have been established, a User ID and Password are not required and the Login dialog box will not appear. The Mail Merge Recipient dialog box appears.
-
Make sure all the records are checked and click
OK.
Note that no records actually appear after you click OK. This is expected behavior, as this step is simply making the data records available to Microsoft Word. Additional steps are necessary to actually insert the data records into your document.
The Mail Merge Recipients dialog box provides options for refining your mail merge list. For example, you can add or delete records, and specify certain record criteria. For help on using the commands appearing in this dialog box, see Microsoft Word documentation.