Work with More than One Session
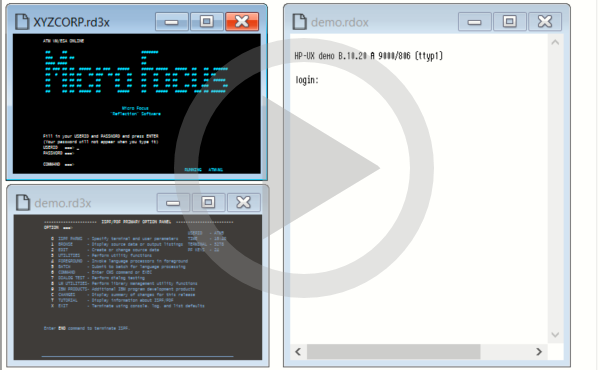
In Reflection, the size, location, and arrangement of the workspace and any open terminal or Web session documents can be saved to a layout file. When opened, a layout automatically opens and arranges all documents saved to the layout, opens and positions any docked panes (such as Scratch Pad or Screen History), and connects session documents to configured hosts.
If the workspace is configured to display documents as tabs, you can create a name for each tab. This can be useful when you use two different applications on one host. You can create a session document that connects to that host, then open the document twice, add a different name to each tab, and then save your layout.
If you are using the Classic user interface mode, you can arrange multiple sessions on your desktop and save them in a layout. The next time you open the layout, you'll find everything in place just the way you left it.
To make it easier to work with more than one session, you can:
Videos
Create or Modify a Layout
By saving terminal sessions you use regularly to a layout, you can open them all at once, arranged as you prefer, just by opening the layout.
note
If you already have terminal session or Web session document open when you open a layout, the layout opens in a new workspace.
To create a layout
-
Open the documents and any docked panes you want to include in the layout.
-
If you want to be able to access multiple layouts using the Reflection .NET API, open the Layout Settings dialog box as follows and enter the appropriate values for the server and channel name:
The steps for opening the Layout Settings dialog box depend on your user interface mode.
User Interface Mode Steps Ribbon On the File menu or the Reflection button  (if using the Office 2007 Look and Feel), choose Settings, and then Layout Settings.
Reflection Browser On the Reflection menu, choose Settings and then Layout Settings. TouchUx Tap the Gear icon and then select Layout Settings. Classic or Classic MDI VT From the Setup menu, choose Layout Settings. Classic or Classic MDI IBM From the Options menu, choose Layout Settings. -
If the workspace is configured to display documents as tabs, you can add a descriptive label to each document tab:
Right-click the session tab, and then choose Tab Properties.
In the Name box, type in the name that you want to appear on the tab, and then click OK.
-
Carefully arrange all the session windows until you have set everything up just the way you want it.
-
If you are using the Classic user interface mode, arrange the sessions on your desktop.
-
For other interface modes, arrange the windows in the workspace and adjust the size and position of the workspace, as needed.
-
-
Save the layout. The steps depend on your user interface mode.
User Interface Mode Steps Ribbon On the File menu or the Reflection button  (if using the Office 2007 Look and Feel), choose Save Layout.
Reflection Browser On the Reflection menu, choose Save Layout. TouchUx Tap the Folder icon and then select Save Layout. Classic or Classic MDI VT From the File menu, choose Layout. and then Save Layout As. Classic or Classic MDI IBM From the File menu, choose Save Layout. -
Name and save the layout file to a trusted location, and then click Save.
If you haven't saved the session documents, you are prompted to do so.
To modify a saved layout
- To save changes to a layout, save it again using the same name.
note
Reflection doesn't prompt you to save changes to a layout.
Open a Layout
By saving terminal sessions you use regularly to a layout, you can open them all at once, arranged as you prefer, just by opening the layout.
note
If you already have terminal session or Web session documents open when you open a layout, the layout opens in a new workspace.
To open a layout
-
Go to the Open dialog box. The steps depend on your user interface mode.
User Interface Mode Steps Ribbon or Reflection Browser From the Quick Access Toolbar, click the Open  button.
TouchUx Tap the Folder icon and then select  Open.
Open.Classic or Classic MDI From the File menu, choose Open. -
Select the layout file you want, and then click Open.
Layout files created in Reflection end with the extension
.rwsp.
Set Tab Colors
When you are running multiple sessions, color-coding session tabs can help identify which host application each session is connected to.
You can customize the text and background colors of a session tab. After you set the tab colors for your sessions, you can save them in a layout file so that the tab colors are used the next time you open the layout.
note
-
You can save session tab color settings only in layout files. These settings are not saved in session files.
-
You can change only one tab at a time. You cannot globally change all tab colors.
To set tab background and text colors
You can set different colors for a session tab's text and background. You can also set different colors for active and inactive states.
-
On the Session tab, right-click and then select Customize Tab Colors to open the Customize Tab Colors dialog box.
-
To set inactive tab colors, in the Inactive tab colors list, click Change and then select the foreground (text) color or background color.
-
Set the Active tab colors in the same way.
-
Save the color settings in a layout. The steps depend on your user interface mode.
User Interface Mode Steps Ribbon On the File menu or the Reflection button  (if using the Office 2007 Look and Feel), choose Save Layout.
Reflection Browser On the Reflection menu, choose Save Layout. TouchUx Tap the Folder icon and then select Save Layout.
tip
If you want to set only the tab background color, you can use an alternative approach. With a session open, click the Appearance tab and from the Color menu, choose a color. Then click on the session tab to set its background color. (The selected color is used as the tab's background, for both active and inactive states.)
More information
 Working with Sessions
 Creating and Using Layouts