Change the Look and Feel of a Session
Change the look and feel of sessions, including color settings, cursor styles, sounds, underlining of input fields, and which dialog opens when Reflection starts. Control these options and more by creating and using custom theme files.
 Changing a Session's Look and Feel
Configure Color Settings
You can change the colors for the application frame and Ribbon or for the session.
To change the color of the application frame and Ribbon
-
Open the Reflection Workspace Settings dialog box. The steps depend on your user interface mode.
User Interface Mode Steps Ribbon On the File menu or the Reflection button  (if using the Office 2007 Look and Feel), choose Reflection Workspace Settings.
Reflection Browser On the Reflection menu, choose Settings and then Reflection Workspace Settings. TouchUx Tap the Gear icon and then select Reflection Workspace Settings. -
Under Workspace Settings, click Configure User Interface.
-
From the Look and Feel / Color scheme box, select the color scheme.
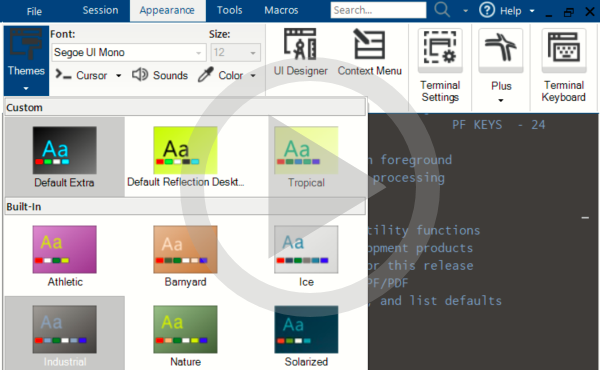
To change the colors used in a terminal session
-
Open the Settings window. The steps depend on your user interface mode.
User Interface Mode Steps Ribbon or Reflection Browser With a session open in Reflection, from the Quick Access Toolbar, click  .
.TouchUx Tap the Gear icon and then select Document Settings. -
Under Terminal Appearance, click Manage Themes.
-
Click Select another theme file.
-
Select a theme with the colors and sounds you prefer.
-
Click OK.
Select a Cursor Style
You can set the cursor style and save it as a modification to your theme.
To select a cursor style
-
Open the Settings window. The steps depend on your user interface mode.
User Interface Mode Steps Ribbon or Reflection Browser With a session open in Reflection, from the Quick Access Toolbar, click .TouchUx Tap the Gear icon and then select Document Settings. -
In the Settings dialog box, click Manage Themes.
-
Select Modify the currently selected theme file.
-
In the Modify Theme dialog box, under Cursor Style, change the cursor settings and click OK.
Map a Sound to an Event
You can configure Reflection to play a sound when a session-level event occurs. This mapping is saved as a modification to your theme.
To map a sound to an event
-
Open the Settings window. The steps depend on your user interface mode.
User Interface Mode Steps Ribbon or Reflection Browser With a session open in Reflection, from the Quick Access Toolbar, click .TouchUx Tap the Gear icon and then select Document Settings. -
In the Settings dialog box, click Manage Themes.
-
Click Modify the currently selected theme file.
-
From the Modify Theme dialog box, under Sounds, select an item in the Events list.
-
Select a sound file to map to the selected event. (You can type the path and filename or click Browse to locate the file.)
Underline Fields That Accept Input
For IBM 3270 and 5250 terminals, you can set Reflection to underline fields that accept input. You can choose to always underline these fields, to allow the host to control whether they should be underlined, or to never underline them.
To specify whether to underline fields that accept input
-
Open a 3270 or 5250 terminal session.
-
Open the Settings window. The steps depend on your user interface mode.
User Interface Mode Steps Ribbon or Reflection Browser With a session open in Reflection, from the Quick Access Toolbar, click .TouchUx Tap the Gear icon and then select Document Settings. -
Under Terminal Configuration, click Configure Terminal Attributes(3270) or Configure Terminal Settings(5250).
-
In the Input field underlining list, select whether to underline input fields.
Create a New Theme File
To create a theme file
-
Open the Settings window. The steps depend on your user interface mode.
User Interface Mode Steps Ribbon or Reflection Browser With a session open in Reflection, from the Quick Access Toolbar, click .TouchUx Tap the Gear icon and then select Document Settings. -
Under Terminal Appearance, click Manage Themes.
-
Click Create a new theme from an existing theme file and then select the theme file to use as a template for creating a new theme file.
Built-In Select this option to show the theme files distributed with Reflection. Custom Select this option to show the theme files that you've previously modified and saved. If the file you want doesn't appear in the list, click Browse to select it. Note: The file must be in a trusted location. Use the new file in the current session document Use the file you are about to create with the current session. -
In the Modify Theme dialog box, select the settings for the theme file and then save the file.
Specify which Dialog Box to Open when Reflection Starts
By default, the Create New Document dialog box is displayed when you open the Reflection workspace.
To specify which dialog box to display when Reflection opens
-
Open Workspace Settings. The steps depend on your user interface mode.
User Interface Mode Steps Ribbon On the File menu or the Reflection button (if using the Office 2007 Look and Feel), choose Reflection Workspace Settings.Reflection Browser On the Reflection menu, choose Settings and then Reflection Workspace Settings. TouchUx Tap the Gear icon and then select Reflection Workspace Settings. -
Under Workspace Settings, click Configure Workspace Defaults.
-
In the When starting workspace box, select one of the following options.
Select this To do this Show New dialog Display the New dialog box used to choose which type of session to configure. Show Open dialog Display the Open dialog box used to choose a session document file. Show nothing Open the workspace without displaying a dialog box. Run Startup Action Specify an action or sequence of actions to perform when the workspace opens.
More information
Select Alternate Icons
You can specify for Reflection to display simple, "flat" toolbar icons that support a modern look and feel or to display the legacy toolbar icons used on older versions.
The Reflection Ribbon, Browser, and TouchUx user interfaces display the modern, "flat" icons by default. Conversely, the Classic and Classic MDI interfaces display the legacy icons used on older versions by default.
You can switch these default settings as shown below.
To specify whether to use modern or legacy icons
-
Open Workspace Settings. The steps depend on your user interface mode.
User Interface Mode Steps Ribbon On the File menu or the Reflection button (if using the Office 2007 Look and Feel), choose Reflection Workspace Settings.Reflection Browser On the Reflection menu, choose Settings and then Reflection Workspace Settings. TouchUx Tap the Gear icon and then select Reflection Workspace Settings. -
Under Workspace Settings, click Configure User Interface.
-
In the Configure User Interface dialog box, Under UI Preferences, select Use alternate icons.
The Use alternate icons option switches the default toolbar icon settings. With this option selected, the Ribbon, Browser, and TouchUx user interfaces use the legacy Reflection icons and the Classic and Classic MDI interfaces use the modern "flat" Reflection icons.
-
Restart the workspace.
More information