Creating a Unit Test Library Project
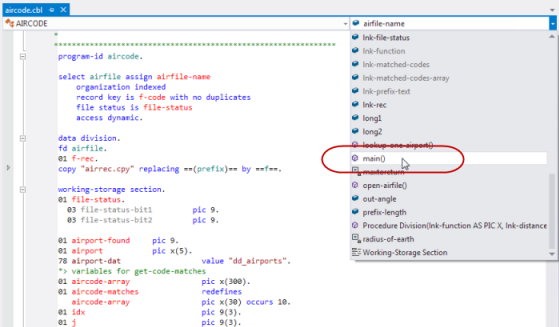
- In Solution Explorer, double-click aircode.cbl to open it in the editor.
-
Click
 beside the types and members navigational dropdown, then select
main().

The cursor is positioned in the main section of the program.
-
Position your cursor anywhere in the main section of the program, then right-click and select
Create Unit Test.
The Create Unit Test dialog box appears.
-
Select
Program Test, click
Next twice, and then
Finish to accept all the defaults.
A unit test project has been created in the current solution, and includes one test program (TestAIRCODE).
-
Double-click
TestAIRCODE.cbl to open the test program in the editor.
The following elements have been created:
- The test case:
 entry MFU-TC-PREFIX & TEST-TESTAIRCODE.

   call "AIRCODE" using
                 by value lnk-function
                 by value lnk-airport1
                 by value lnk-airport2
  ...
This section calls into the source code that you are testing, using the parameters initialized in the test setup.
- The test case setup:
 entry MFU-TC-SETUP-PREFIX & TEST-TESTAIRCODE.
  perform InitializeLinkageData
*> Add any other test setup code here
  goback returning 0
 .

 InitializeLinkageData section.
*> Load the library that is being tested
  set pp to entry "AirportLinkLibrary"
  ...
This portion of code is run before the test case, and sets a procedure pointer to the code under test. It also goes on to initialize the variables required to call into the source code.
Tip: You could also add a test teardown section, which would run after the test case - see Elements of a Test Case. It does not matter in which order these sections appear in the file; they will be run in the correct order (setup, test case, then teardown). - The test case: