Filtering z/OS Jobs
By default, the viewing filter for z/OS job output shows jobs submitted under the authority of your TSO user ID, or jobs that include your user ID as part of the job name on a JOB card. Jobs which execute under the authority of security entities other than your TSO user ID (such as ZMF build jobs) or jobs with their own application names in the job card JCL require a custom filter to display under the z/OS Jobs node of Serena Explorer.
Create, modify, or delete job viewing filters for the Serena Explorer view from the contextual menu for the appropriate filter node.
Creating a New Job Filter Modifying an Existing Job Filter Renaming a Job Filter Deleting a Job Filter Refreshing Job Filters
Creating a New Job Filter
-
Right Click the z/OS Jobs node under the ZMF server.
-
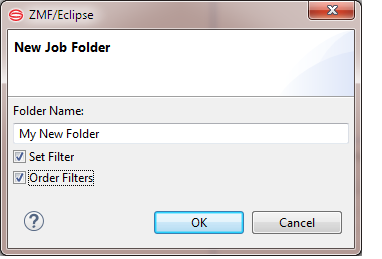
Select New Folder. The New Job Folder window displays.

-
Type the name of the new filter in the text box and optionally select Set Filter and Order Filters, and click OK.
-
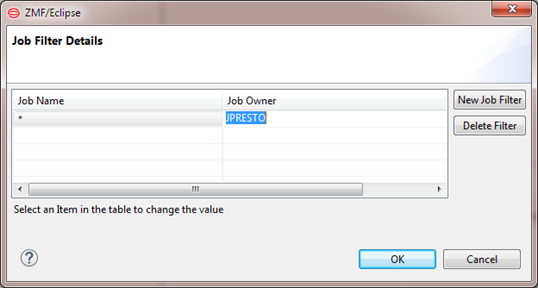
If you checked the Set Filter option, the Job Filter Details window is displayed.

-
When the Job Filter Details dialog displays, edit the default search patterns as needed. Values entered in the text boxes of the dialog map to operands in parentheses in the filter strings shown in the Job Filters window.
- Job Name — Enter a search pattern for the job name or application name.
- Job Owner — Enter a search pattern for the security entity that owns the job.
The following syntax conventions apply to job filter strings:
- The asterisk (*) in a job filter string is a wildcard character that matches any number of characters of any value in the position shown.
- Literals in a filter string match identical characters in the positions shown.
- The
useridvariable in a filter string** matches the TSO user ID of the current ZMF for Eclipse user in the indicated position.
-
Click OK in the Job Filter Details dialog to commit your changes to the filter string.
-
If additional filter strings are desired, click the upper New Job Filter button to the right of the window. The Job Filter Details dialog displays with a default filter string. Edit as needed and click OK.
-
If fewer filter strings are desired, select the filter string to be deleted in the Filter Strings selection box and click the lower Delete Filter button at right. Filter strings must be deleted one at a time.
-
When all desired filter strings are complete and correct, click OK to save your new data set filter and close the Job Filter Details window.
-
If you selected the option to Reorder Filters then the Reorder Folders window will display, and you may then move the folders up or down.
Modifying an Existing Job Filter
To modify a job filter in the Serena Explorer view, perform the following steps.
-
Expand the z/OS Jobs node under the ZMF server.
-
Under z/OS Jobs, right-click on the folder node you want to modify. When the contextual menu displays, select Properties.
-
When the Job Filter Details window displays, edit as described earlier.
Renaming a Job Filter
To rename an job filter in the Serena Explorer view, perform the following steps.
-
Expand the z/OS Jobs node under the ZMF server.
-
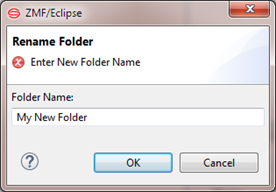
Right-click on the folder you want to rename. When its contextual menu displays, select Folder Rename.
-
The Rename Folder window displays. Type the new filter name, then click OK.

-
Click OK to save your changes and close the Rename Folder window.
Deleting a Job Filter
To delete a job filter in the Serena Explorer view, perform the following steps.
-
Expand the z/OS Jobs node under the ZMF server.
-
Right-click on the folder you want to delete. When its contextual menu displays, select Delete.
-
When the Confirm Delete window displays, first verify that you have teh right folder, then click the OK button to delete .
Refreshing Job Filters
The contextual menu for the top-level z/OS Jobs node provides a Refresh function that refreshes the list of folders for z/OS JES jobs. This function may be needed after you create a new job folder.